
However, as it appeared in the Dollar Tree under the store lighting in the blister pack, it was easy to pass over. In fact, the first time I saw it I did briefly consider it, then changed my mind. When I went back to the store about 2 months later, the only giraffe left was falling apart in the package. Since these toys are not glued but just snap together, they will come apart when handled roughly or in shipping. But it is a very easy fix with a drop of white glue for a temporary hold, or hobby glue (styrene model or super glue) for a permanent hold. One of the reasons I didn't buy it the first time I saw it was because of the face. I always zero in on the face, and I didn't like it. As I was working on the animation part of the project, I found that the face was really distracting me. I really didn't like the expression! Something as simple as that, and easy to correct, can really throw off a creative eye.
It was rather easy to scrape off the paint of the original eye and make a new one with a black Sharpie. With the mouth, the red paint and snarling lips gave the giraffe a sinister look. Just shaving away the unwanted parts of the lips and again just scraping off the red paint made a dramatic improvement. A little brown acrylic paint was then added to the mouth to make a slight smile and his nostrils were highlighted with a dot of brown paint. One eye had an eyebrow that I just sanded away, and now the face is pleasant but still realistic. Although the spots are rather well done, the yellow bare plastic does really detract from the over-all appearance, so the giraffe was repainted. First a flat white hobby grade spray paint from a can was used to prime the plastic after it was cleaned, washed, and lightly sanded. Then regular craft acrylics were used in a light tan (khaki) color with soft brown (sable) for the spots. Then paint was dry-brushed over the whole figure with a fan brush, to suggest a furry texture. The facial features remain the same as my original repainting seen in the video clip and diagrams. I have repainted things many times in my lifetime, but it never ceases to amaze me how something as simple as a paint job can improve the look of anything. And anything can be painted if the surface is properly prepared. Two very important things to remember!
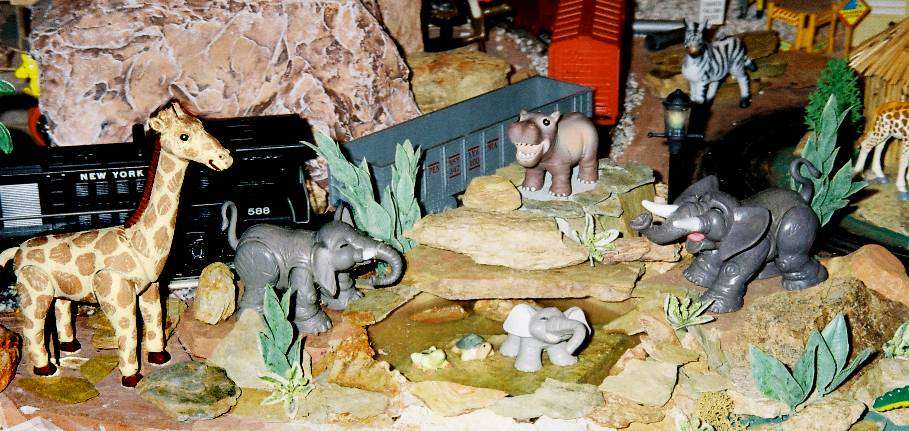
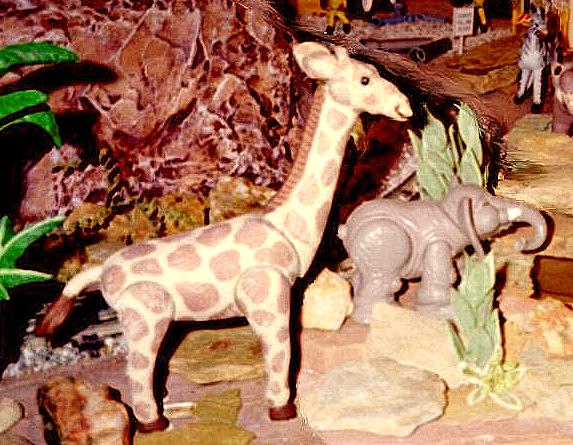
If it is beyond your skill level to repaint the figure, it still looks good. Remember that on the layout one particular object isn't viewed in isolation, but rather viewed as it relates to other things. So any shortcoming is not as important as it seems when it is viewed alone. Hence the expression "the whole is more than the sum of its parts."
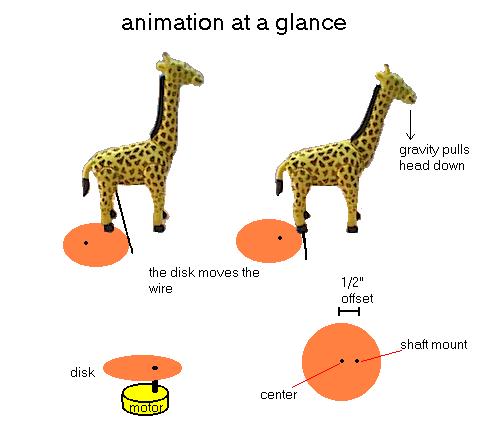
One last thing about animation. Movement needs to be a bit exaggerated for it to be apparent. Subtle movement is often not noticed, so consider projects with large, theatrical motion so it is easily seen.
Regarding the motor, it is not a good idea to use 120 VAC in your layout if you are a beginner. Wires can easily become crossed and before you know it you are sending full housepower through yourself, your rails, or other equipment. Another thing that needs to be addressed for safety's sake is to monitor the amount of heat a motor (or light) gives off, running on either low voltage or full house power of 110-120 VAC. I make sure there is an air space around the motor so heat isn't conducted to the plywood or surrounding surfaces. I have only the mounting tabs of the motor touching the plywood and only run the animations intermittently. If you will be running these motors continuously, best to mount them in metal rather than wood. Also, some electrical codes would require that this timing style motor be mounted in an electrical box with a cover, including its wire connections. Remember, following electrical codes not only protects you and your property, it helps if you ever have to make an insurance claim because of a fire. If you are a beginner or just want to keep things simple, use a low voltage gearhead motor of about 30 rpm. Please read all the safety advice on this site before attempting a project!
My first elephant animation project, which was in run 153 of OGR magazine, uses my disk and arm method for the animation. Although not a very elegant design, I used common materials like plywood and coat hanger wire. It has been in use without a problem for over 10 years now, however it is not run continuously. There would be wear on the plywood as the arm rubs against the disk over time, but a homemade washer cut from a plastic bottle placed between the plywood parts reduces the friction and wear. There is a bit of a trade off when you use common, easy to cut materials like wood as compared to metal. Also, epoxy is a great help in fastening the plywood disk to a motor shaft. No fittings to find or collars to tap. Another project that has been very reliable for about 18 years uses that same arm and disk method, however I sealed all the wooden parts with marine varnish, about 3 coats. That really stabilizes the wood from changes in humidity and helps with the wear. As long as the animation is not run continuously, these homemade mechanisms are very dependable. Look at the lion animation project for a slight improvement on the disk and arm idea used in the original elephant project. If you have the means to make the disk and arm out of metal, with a little lubrication the mechanism should outlast the motor. There hasn't been any noticeable wear of the plastic of the Fisher Price animal figures, mostly because the speed of the motion isn't very fast. But again, sporadic breaks will always increase the longevity of everything. With this giraffe project, plywood is an ideal choice for the disk, especially if you apply a little paste wax to the disk's edge where it rubs against the wire connected to the animals neck. Sealing the disk with paint or varnish is also a good idea. Using momentary push buttons to run the motor will insure that an animation won't be left running for any length of time with no one watching. I use an old computer to control the animation at times, but simple push buttons, even door bell switches for low voltage applications, are a great idea and provide some interaction for a guest. There can be a second set of push buttons or toggle switches at the main control panel in addition to a cut-off switch for use when a guest abuses the controls.